vrijdag 25 maart 2016

Art Specially-nieuws

Goedenavond!

Kom je ook naar de Art Specially in Nijkerk? Op 9 en 10 april ben je welkom op de allergaafste stempelbeurs van Europa!
Zaterdag 9 april ben ik ook aanwezig om een leuke make&take te geven op het Stampin'Up! plein.
Onder de deelnemers zal ik de stempelset verloten die we gebruiken tijdens de workshop.
En: Als je voor 4 april je bestelling doet, dan kan ik je spulletjes meenemen naar de beurs. 
Dit geldt natuurlijk ook voor de mensen uit België! Op deze manier hoef je geen verzendkosten te betalen. Mooi toch? 😃 En bestel je voor 31 maart, dan krijg je bij elke €60,00 ook nog een Sale-a-Bration artikel kado!
Ik hoop je te zien op 9 april!


dinsdag 15 maart 2016

Paasworkshop 24 maart

Goedemiddag!
Op 26 maart is het Pasen. Daarom geef ik op donderdagavond 24 maart een workshop in dit thema. Een mooie gelegenheid om eens bij Pasen stil te staan én ervoor te zorgen dat je een gezellig aangeklede ontbijt/brunch/lunch-tafel hebt.
We zullen 4 projecten maken.Het wordt een afwisselende avond: een kaartje, een label en een paar 3D-items neem je mee naar huis.
Kom je ook? Voor deze avond betaal je €17,50. Dit is uiteraard inclusief alle materialen en koffie/thee met wat lekkers.

Even een gezellig sfeerbeeld ;-)
Ik hoop je de 24e te mogen verwelkomen! Geef je snel op, want de ruimte is helaas beperkt.

Fijne dag!
Xandra
 
photo seperator.jpg

vrijdag 11 maart 2016

Thank You


Hi there!

Today I'm playing along with the International Stampin'Up! Blog Highlight from Kylie Bertucci.
She is also a Stampin'Up! demonstrator, and lives in Australia. I love her artwork, and all the effort she puts in doing lots of things for all the demonstrators in the world. She really rocks! 

Hoi allemaal!
Vandaag doe ik mee met de International Stampin'Up! Blog Highlight van Kylie Bertucci. Zij is net als ik Stampin'Up! demonstratrice, en ze woont in Australië. Ik ben dol op haar stijl. En ze doet een heleboel voor demonstrators wereldwijd. Daar bewonder ik haar enorm voor! Dit geeft ook precies aan wat Stampin'Up! is: samen proberen een verschil te maken, elkaar helpen waar mogelijk, en omzien naar elkaar.

The theme of this bloghighlight is Tank You, so I'm playing along with this card:
Het thema vandaag is Thank You. Daar heb ik deze kaart voor gemaakt:


I "cased" a card which is in the annual catalog, and just used other stamps and colors. Idea is the same, card turns out completely differtently! Love it :-)
 
Ik heb een kaart gelift uit de jaarcatalogus. Door enkel een andere stempelset te gebruiken krijg je een totaal andere kaart. Terwijl het hetzelfde idee is. Ik houd ervan :-)

I used the Sale a Bration stampset Flowering Fields (for free untill the 31th of march!) and the Endless Thanks set from the annual catalog. And that cute flower in the corner....it's the InColor Blossom accents. Really underrated in my humble opinion! (and you know what? It's very likely that they are going to dissapear from june!! So if you want those cuties, grab them now they're still available just like the 14-16 incolors!)
I put some metallic silver thread, a little banner and a little piece of Natural Chevron ribbon under the flower.So cute ;-)

Ik gebruikte de Sale-a-Bration stempelset Flowering Fields (gratis tot en met 31 maart!!) en de stempelset Endless Thanks uit de jaarcatalogus. En dat schattige bloemetje in de hoek? Dat is de InColor Blossom Accents. Zeer ondergewaardeerde embellies als je 't mij vraagt! (enne....ze gaan zeer waarschijnlijk uit het assortiment per juni, dus bestel ze snel als je ze nog wilt hebben! Net als de 14-16 InColors! Bestel ze zolang ze er nog zijn, want tegen de tijd dat de retiredlist uit is ben je te laat!)
Onder het bloemetje zit een bannertje van Blackberry Bliss cardstock en een stukje Natural Chevron Ribbon.

I hope you like my card. It was really fun playing along with this BlogHighlight. Kylie, thank you so much for this opportunitie!
On Kylies blog, you can vote for your favourite submitted cards. You get 5 votes, which you can use by just clicking on the heart in the corner of the card you like.

Ik hoop dat je het een leuke kaart vindt en dat ik je heb kunnen inspireren. Ik vond het superleuk om mee te doen met deze BlogHighlight. Kylie, dank je wel voor deze mogelijkheid!
Op Kylies blog kun je stemmen op de kaartjes die je het leukst vindt. Je kunt 5 stemmen verdelen, door op het hartje in de hoek van elke kaart te klikken.

I wish you wonderful day. Thank you for visiting my blog!
Ik wens je een heerlijke dag toe. Dank je wel dat je even kwam kijken!

xxx
Xandra
photo seperator.jpg

donderdag 3 maart 2016

To be or not to be.....

....a display stamper... ;-)
Stampin'Up! is currently looking for display stampers for the next OnStage event in Amsterdam. This means you make tons of examples with the new products that are coming. So if you want to apply for this, you have to make a blogpost with the following items:
3 cardfronts, 2 3Dprojects and a lay-out. So that is roughly what I've been making the last days.
And that's why this post is in English ;-)

First: Three cardfronts:


One of the most difficult cards I ever had to make. On my birthday (december 3th), my sweet auntie passed away. For her funeral she had requested that there were no ribbons on flowers, but just beautiful cards.
So I made two cards. This was one of them. It's 13,5x13,5 cm. In the Netherlands this is a much used size for a card.
I used the hostess-set Best Thoughts. I stamped the images on watercolor paper and painted the flower and butterfly with the aquapainters and our inks.
The sentiment is from the Sheltering Tree. We are still truly thankfull for all the things she has done for everyone. So that was the perfect sentiment.


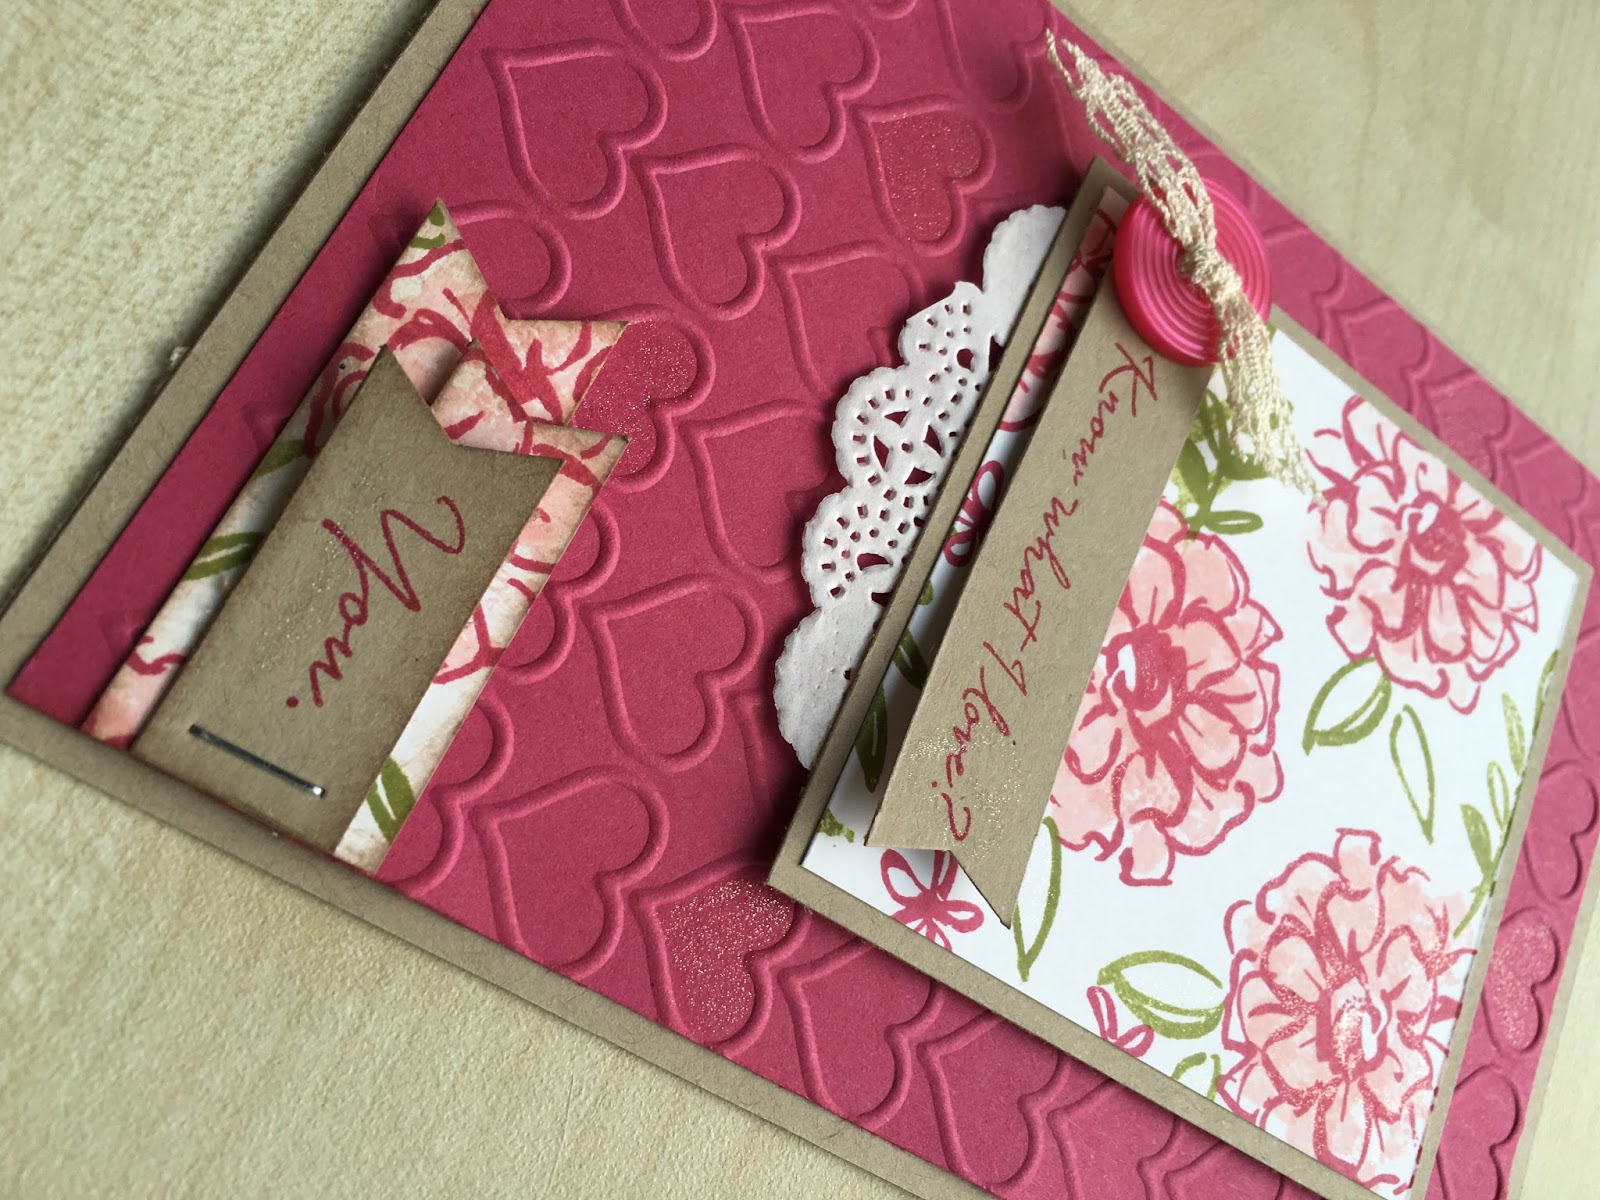
Next is a more happy card: I made this for my sweetest friend. Her boyfriend needed a valentinescard, and asked me to make it for her. So I did. I used the Sale-a-Bration stampset What I love. Had real fun with stamping, embossing and some ribbon and a button. Happy about how this card turned out!

And then a happy birthday card. You instantly become happy when you see this card ;-)
I used the It's my party dsp and the Party with cake stampset. Inside there is more, but I will show that later. Off course I had to use some Wink of Stella, enamel dots and some bakerstwine. I really love this suite!
 
Next comes the lay out.
Well that was quite a challenge. The only scrapbooking I've done lately was with our Project Life collections. But I really wanted a "conventional" lay out for this assignment. So this is it:
 
Yes. Stampin' like a PRO. Not me, but this is my little big boy David (5 years old) on the pictures. He really knows how everything works when mommy is stamping. And he really loves to help me! And occasionaly he asks me to help him with a card for someone.
This was such an occasion. He wanted a card for his grandma. So we got all the things we needed on the table and made his card.
The jounaling reads:
"You know exactly how everything works. Choosing stamps, choosing the right inkcolors, stamping and of course cleaning everything after the stamping! You really do this like a "pro"! Together we make the card for omi (grandma). You write her name on the envelope yourself! Stamping and crafting together is really the best thing there is! 2015/12/20"

Used materials:
One sheet of Bermuda Bay dsp from the Brights dsp stack, two sheets of vellum. Handheld stapler, Everyday chiq washi tape.
Crushed curry, soft suede, tangerine tango, bermuda bay and basic black ink. Whisper White craft ink, and a little bit embossing powder.
Stampsets: Dots for days, Layered Letters, Larger than Life alphabet and Back to basics alphabet.


(somehow this image keeps turning on its side and I can't get it the right way!! sorry!!!)

Next up is the first 3D item. A sweet little treatbox, just perfect for a small gift of chocolate. I stamped it whith the Butterfly Basics stamps. On the lid I made a little ornament with some punched cardstock and glimmerpaper.

Then the last Item:

A milk carton, that I made using the Giftbag punchboard! Really like this "extra feature" of this punchboard. It makes it even more versatile than it allready is!
I used the Birthday Bouquet dsp (note to self: hoard this before it's gone!!) to make the milkcarton. Then I added the sweet sweet Easter Lamb to decorate the milkcarton. Just a few flowers and pearls, a clothespin and a little bit of sequin trim was needed to decorate this sweet box. 
I've put some eastereggs in it, so let's see who we're going to surprise with this box ;-)

I hope you enjoyed this verrrrrry longgggg and photo-heavy post ;-) Thank you for stopping by!

Happy day!
Xandra
 
photo seperator.jpg